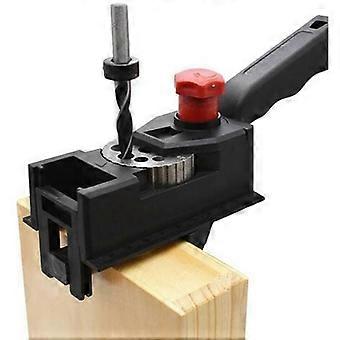
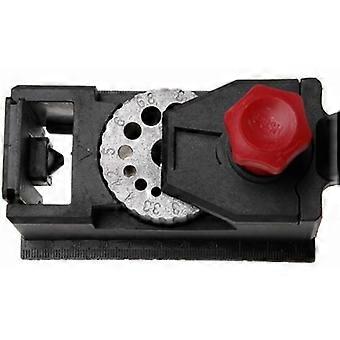
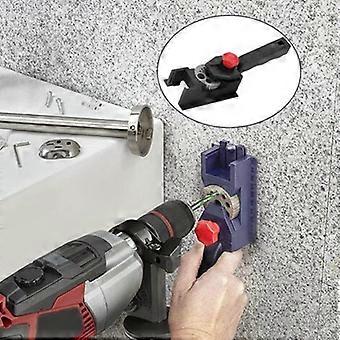
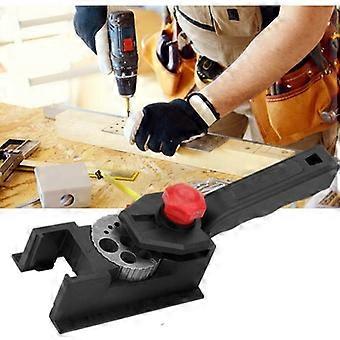
Universal Drilling Jig with Adjustable Hole Sizes, Suitable for Wooden Dowels, Non-Slip, Ø 3-12 mm
+ CHF 17.49 Versand
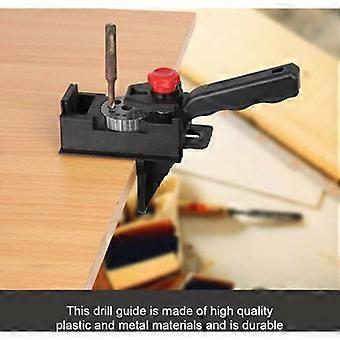

Universal Drilling Jig with Adjustable Hole Sizes, Suitable for Wooden Dowels, Non-Slip, Ø 3-12 mm
- Marke: Unbranded
Universal Drilling Jig with Adjustable Hole Sizes, Suitable for Wooden Dowels, Non-Slip, Ø 3-12 mm
- Marke: Unbranded
Bespaar CHF 8.00 (21%)
UVP
14-Tage-Rückgabepolitik
Bespaar CHF 8.00 (21%)
UVP
14-Tage-Rückgabepolitik
Zahlungsmethoden:
Beschreibung
Universal Drilling Jig with Adjustable Hole Sizes, Suitable for Wooden Dowels, Non-Slip, Ø 3-12 mm
- Marke: Unbranded
- Kategorie: Spannvorrichtungen
- Fruugo-ID: 411971250-871321608
- EAN: 5099223603933
Produktsicherheitsinformationen
Bitte beachten Sie die unten aufgeführten spezifischen Produktsicherheitsinformationen für dieses Produkt
Die folgenden Informationen werden vom unabhängigen Drittanbieter bereitgestellt, der dieses Produkt verkauft.
Produktsicherheitsetiketten

Lieferung und Rückgaben
Versand innerhalb von 24 Stunden
-
STANDARD: CHF 17.49 - Lieferung zwischen Do. 19 Februar 2026–Mi. 25 Februar 2026
Versand von China.
Wir tun unser Bestes, um dafür zu sorgen, dass die von Ihnen bestellten Produkte vollständig und gemäß Ihrer Spezifikationen an Sie geliefert werden. Wenn Sie allerdings eine unvollständige Bestellung oder Artikel erhalten, die sich von den bestellten unterscheiden, oder es einen anderen Grund gibt, warum Sie mit Ihrer Bestellung nicht zufrieden sind, können Sie die gesamte Bestellung oder einzelne darin enthaltenen Produkte zurücksenden und eine vollständige Rückerstattung für die Artikel erhalten. Vollständige Rückgaberichtlinie ansehen
Details zur Produktkonformität
Bitte beachten Sie die unten aufgeführten Konformitätsinformationen zu diesem Produkt.
Die folgenden Informationen werden vom unabhängigen Drittanbieter bereitgestellt, der dieses Produkt verkauft.
Hersteller:
Es folgen die Kontaktdaten für den Hersteller des jeweiligen Produkts, das auf Fruugo verkauft wird.
- Shenzhen Yuantianheng Trading Co., Ltd.
- Shenzhen Yuantianheng Trading Co., Ltd.
- 1705, Building A, Zhongzheng Times Building, West Gate, No. 89 Longcheng Avenue,
- Shangjing Community, Longcheng Street, Longgang District
- Shenzhen
- CN
- 518000
- haixingkuajing2022@163.com
- 8619925457854
Verantwortliche Person in der EU:
Es folgen die Kontaktinformationen für die verantwortliche Person in der EU. Die verantwortliche Person ist der benannte Wirtschaftsteilnehmer mit Sitz in der EU und verantwortlich für die Compliance-Verpflichtungen in Verbindung mit dem jeweiligen Produkt, das in die Europäische Union verkauft wird.
- VAT SPEED SL
- VAT SPEED SL
- Calle Antonio Salvador N99.1
- Madrid
- Spain
- 28026
- services@vatspeed-eu.com
- 34916321624